Learning to post transforms the trot from a jarring ordeal into a smooth, enjoyable gait. New riders often struggle with timing and balance during those first attempts, but the mechanics become intuitive once you understand how your body works with the horse's movement. This guide breaks down the rising trot into actionable steps that work whether you're riding a school horse or your own mount.
What Is Posting and Why Riders Use It at the Trot
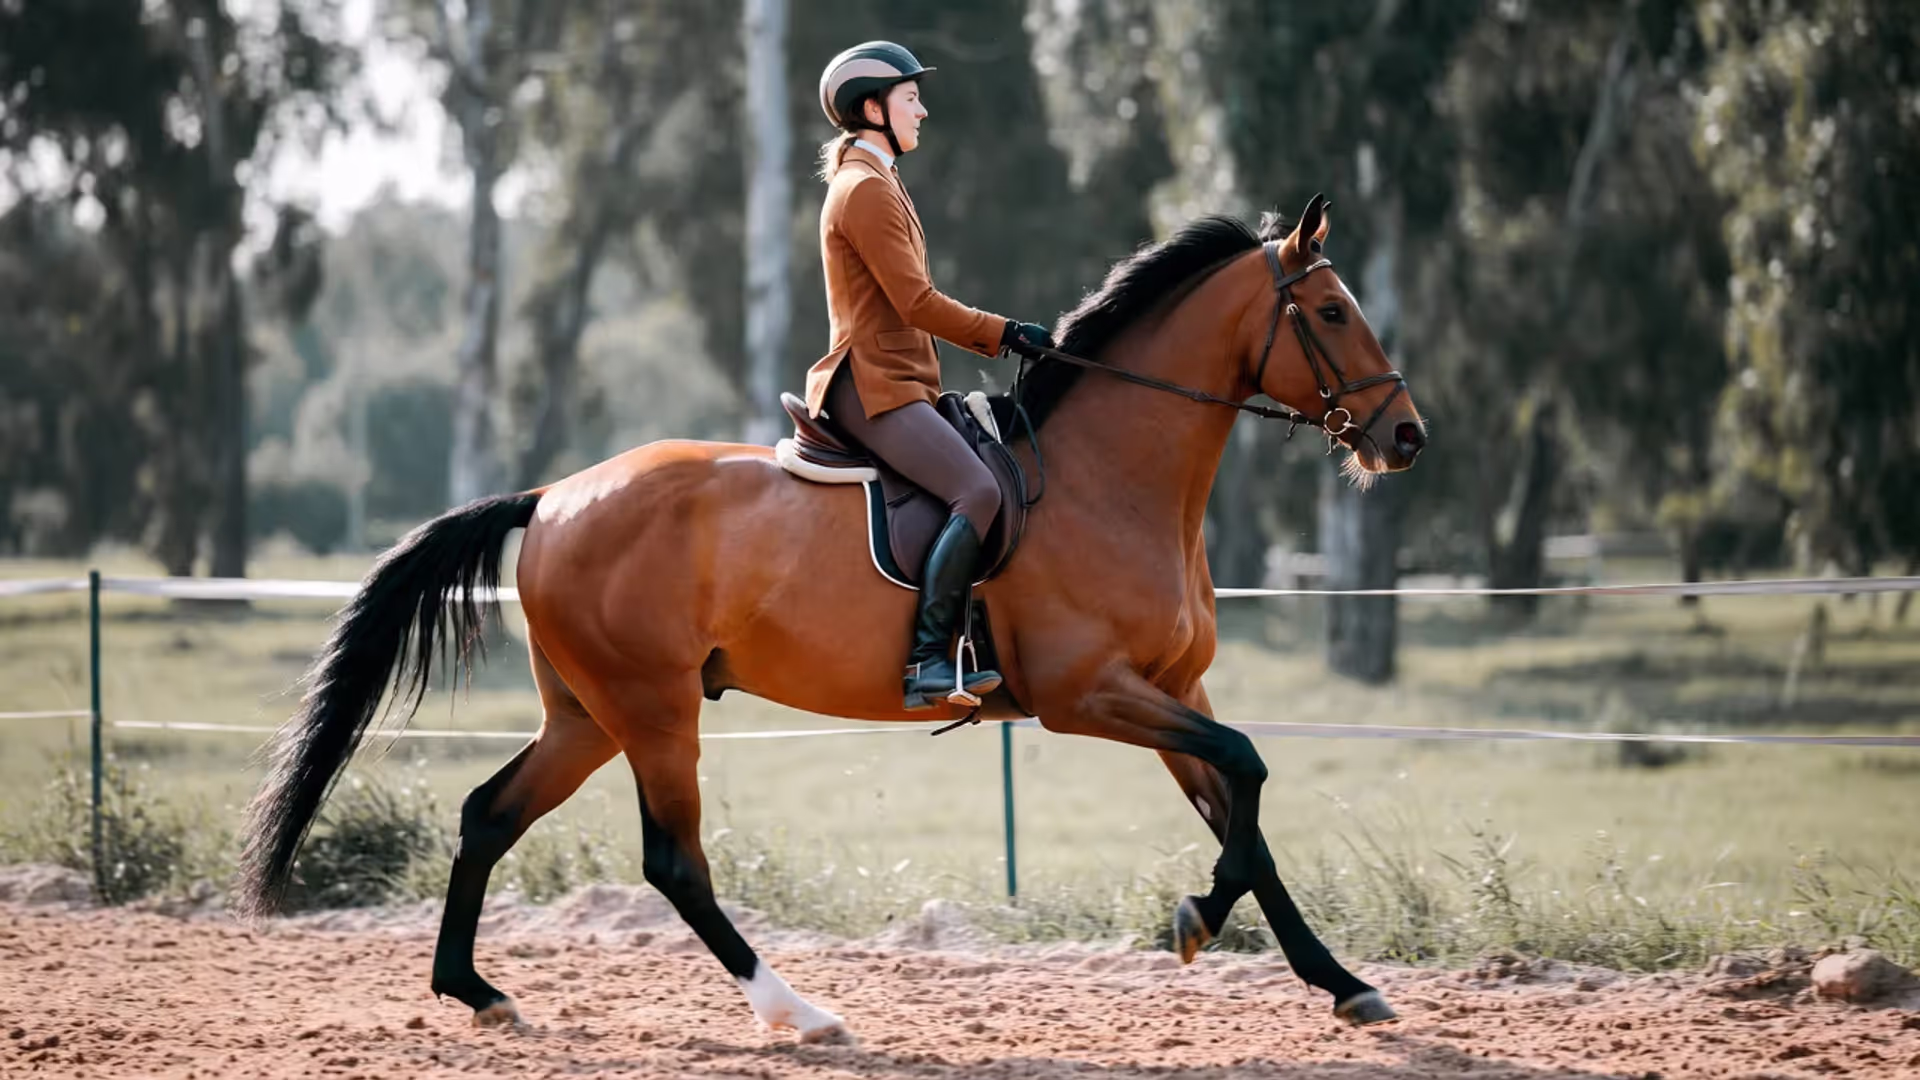
Posting—also called rising trot—means lifting your seat out of the saddle in rhythm with the horse's two-beat trot. Instead of sitting through every bounce, you rise on one beat and sit on the other. This technique developed centuries ago when riders noticed their horses could travel longer distances at the trot without tiring when the rider reduced the weight impact on the horse's back.
When you sit the trot, your full body weight lands on the saddle with each stride. For a horse trotting at 8 miles per hour, that's roughly 120 impacts per minute. Posting cuts that impact in half. Your horse's back muscles stay relaxed, and you avoid the soreness that comes from continuous bouncing.
The sitting trot still has its place. Dressage riders use it for collection work, and Western riders typically sit their jog. But for everyday riding, trail work, and learning horseback riding trot basics, posting keeps both horse and rider comfortable for longer periods. Beginners should master posting before attempting to sit the trot for extended periods, since sitting requires more core strength and a deeper seat than most new riders possess.
Body Position Setup Before You Start Trotting
Your position at the walk determines your success at the trot. Rushing into posting without proper alignment sets you up for gripping, bouncing, and frustration.
Author: Garrett Holloway;
Source: 3templatedesign.site
Correct Seat and Leg Placement
Sit on your seat bones—the two bony points at the bottom of your pelvis—not on your tailbone or thighs. Your weight should drop through your heels in a straight line: shoulder, hip, heel. Check your stirrup length by letting your legs hang naturally; the stirrup bottom should hit just below your ankle bone. Too-long stirrups force you to reach and tip forward; too-short stirrups push your legs forward and put you behind the motion.
Your legs drape around the horse's barrel with your calves making soft contact. Think "long leg" rather than "tight grip." The inside of your thigh and knee rest against the saddle, but they don't clamp. Many riders squeeze with their knees when nervous, which actually makes balance harder by raising your center of gravity and stiffening your joints.
Keep three to four inches between your seat and the cantle (back of the saddle). Sitting too far back locks your hips and makes rising difficult. Your upper body stays vertical—imagine a string pulling your head toward the sky. Shoulders stay over hips, not rounded forward or pinched back.
Hand and Rein Contact Basics
Your hands maintain a straight line from elbow through wrist to the bit. Elbows bend at roughly 90 degrees and stay by your sides, not flapping or pulling back toward your hips. Hold the reins with a firm but gentle grip, like holding a small bird—tight enough it won't escape, soft enough you won't hurt it.
Rein contact should feel like a gentle conversation with the horse's mouth. Too loose and you lose communication; too tight and the horse braces against you. For these trot riding tips to work, your arms must stay independent from your rising motion. Beginners often use the reins to pull themselves up, which jabs the horse's mouth and creates head-tossing or resistance.
Practice the posting motion at the halt first. Without moving forward, press your heels down and let your hip angle close slightly as you rise an inch or two out of the saddle. Your hands shouldn't move. If they do, you're using arm strength instead of leg and core strength.
Step-by-Step Guide to Posting the Trot
Author: Garrett Holloway;
Source: 3templatedesign.site
The posting trot technique builds on small skills that stack together. Breaking it into distinct steps prevents overwhelm and lets you focus on one element at a time.
Step 1: Ask your horse to trot from a walk. Use your legs in a quick squeeze-release at the girth, not a continuous clamp. Your seat stays soft—don't drive hard with your seat bones or you'll confuse the horse about whether you want forward motion or a stop.
Step 2: Feel the two-beat rhythm. The trot has two distinct beats: left diagonal pair (left front and right hind together), then right diagonal pair (right front and left hind together). At first, this feels like chaotic bouncing. Stay calm and count "one-two, one-two" out loud. The rhythm is faster than your walk but regular as a metronome.
Step 3: Let the horse's motion push you up. Don't jump or stand in your stirrups. The horse's back drops away from you on one beat, naturally lifting your seat. Your thigh muscles and stirrups support you for a split second. This rise should feel effortless—if you're working hard, you're doing too much.
Step 4: Sit softly on the next beat. Gravity brings you back down. Let your seat return to the saddle gently, absorbing the motion through your hips and lower back. Think "melt" rather than "plop." Your seat barely touches before the next beat lifts you again.
Step 5: Watch the horse's outside shoulder. When the outside shoulder (the one toward the rail or fence) moves forward, you rise. When it comes back, you sit. This timing puts you on the correct diagonal, which balances the horse's movement. At first, glance down occasionally to check. Eventually, you'll feel which diagonal you're on through your seat.
Step 6: Keep your heels down and core engaged. Your ankle acts as a shock absorber. Heels up means you're standing on your toes, which makes you bounce and lose your stirrups. A tight core stabilizes your upper body so it doesn't flop forward and back with each rise.
Step 7: Breathe and relax your hips. Holding your breath locks your body. Stiff hips can't absorb motion. Exhale through each rise. Let your hip joints hinge open and closed like a door, not like a rigid board.
The posting trot should feel like a gentle swing, not an athletic effort. When riders try to 'do' the posting, they interfere with the natural motion. When they allow the horse's energy to move through them, posting becomes effortless.
— Sally Swift
The rising trot for beginners often feels mechanical at first. You're thinking about ten things simultaneously. After a few sessions, your body recognizes the pattern and your conscious mind can step back. This is when posting shifts from work to flow.
5 Common Posting Mistakes and How to Fix Them
Even experienced riders fall into bad habits. Recognizing these patterns early prevents them from becoming ingrained.
Mistake 1: Rising too high out of the saddle. Some riders stand almost completely upright, which wastes energy and makes sitting back down jarring. You only need to rise two to three inches—just enough to clear the saddle. The motion comes from your hip angle closing slightly, not from straightening your legs completely.
Mistake 2: Gripping with your knees. When nervous or unbalanced, riders clamp their knees against the saddle. This pushes your seat out of the saddle, makes your lower leg swing, and exhausts your thigh muscles within minutes. Fix this by consciously dropping your weight into your heels and thinking "wrap" rather than "grip." Your leg stays on the horse through draping contact, not force.
Mistake 3: Leaning forward. Your upper body tips ahead of your hips, putting you on the horse's forehand. This usually happens when riders rise too high or try to "help" the horse go forward. The correction: imagine your chest has a headlight that points straight ahead, not down at the ground. Your shoulders stay over your hips throughout the rise and sit.
Mistake 4: Losing your stirrups. Your foot slides forward or your stirrup falls off entirely. This often stems from toes-down position or standing in the stirrups rather than letting the stirrup support you. Press your heel down firmly and keep the ball of your foot on the stirrup bar, not your arch or toe. Some riders need slightly shorter stirrups when first learning to post.
Mistake 5: Posting on the wrong diagonal. You rise when the inside shoulder goes forward instead of the outside shoulder. This unbalances the horse on circles and causes one side of the horse's back to work harder. Fix it by sitting for two beats (which changes your diagonal), then resuming your post. Check your diagonal every time you change direction.
Mistake/Problem
Why It Happens
How to Fix It
Rising too high
Trying too hard; standing in stirrups instead of hinging at hips
Close hip angle only 10-15 degrees; imagine ceiling is low
Gripping with knees
Fear of falling; incorrect belief that grip equals security
Drop weight to heels; squeeze a sponge between knees to feel difference between contact and grip
Leaning forward
Eyes looking down; rising from upper body instead of hips
Eyes up at horizon; practice two-point position separately to strengthen position
Losing stirrups
Toes pointed down; foot too far into stirrup
Heels down; keep ball of foot on stirrup bar; check stirrup length
Wrong diagonal
Not watching shoulder; forgetting to check after direction changes
Glance at outside shoulder every few strides; sit two beats to change diagonal
Bouncing instead of flowing
Stiff hips and lower back; holding breath
Breathe rhythmically; think "elastic" through your joints; slow the trot if needed
Understanding how to stay balanced while trotting means addressing these issues systematically. Don't try to fix everything at once. Pick one problem per ride and focus there.
Exercises to Improve Your Balance and Timing While Trotting
Author: Garrett Holloway;
Source: 3templatedesign.site
Drills build muscle memory faster than simply riding circles. These exercises isolate specific skills so you can strengthen weak areas.
Posting without stirrups: Drop your stirrups and cross them over the horse's withers. Post at a slow trot for 30 seconds, rest at a walk, repeat. This forces you to use your core and thigh muscles correctly instead of relying on pushing against the stirrups. Your rises will be smaller and your seat softer. Start with short intervals and build up—this is genuinely tiring until your muscles adapt.
Counting beats out loud: At the trot, count "one-two, one-two" in rhythm with the horse's footfalls. Then count "up-down, up-down" in rhythm with your posting. This connects your brain to the rhythm and helps you feel when you're rushing or lagging behind the horse's tempo. Riders who struggle with timing often discover they're posting faster or slower than the actual trot.
Two-point position practice: Rise into two-point (seat off the saddle, weight in heels and thighs, upper body inclined slightly forward) and hold it for 30 seconds at the trot. This strengthens your legs and proves you can balance without sitting. Then alternate: post for four beats, hold two-point for four beats, post for four beats. The variation challenges your stability and control.
Transitions within the gait: Ask your horse to trot slower, then bigger, then back to a working trot. Maintain your posting rhythm regardless of the trot size. This teaches you to follow the horse's energy rather than imposing your own tempo. Many riders post at the same speed no matter what the horse is doing, which creates disconnect.
Figure-8s and circles: Posting on the correct diagonal becomes automatic when you practice changing direction frequently. Trot a figure-8, checking your diagonal each time you cross the center. Sit two beats to change if needed. This also improves your ability to stay balanced through turns, since circles test whether you're truly centered or compensating with stiffness.
Lengthen and shorten your stirrups: Ride with stirrups one hole shorter than normal, then one hole longer, then back to your usual length. This shows you how stirrup length affects your posting and helps you understand what length works best for your body. Some riders discover they've been riding too long or too short for years.
These trot riding tips work best when practiced regularly in short sessions rather than marathon drilling. Five minutes of focused work beats 30 minutes of mindless repetition.
Frequently Asked Questions About Posting the Trot
Which diagonal should I post on?
Post on the outside diagonal—rise when the horse's outside shoulder (the one toward the rail or fence) moves forward. On a circle to the left, post when the right shoulder goes forward. On a circle to the right, post when the left shoulder goes forward. This diagonal balances the horse's movement through turns. On a straight line, switch diagonals periodically to develop both sides evenly.
Why do I keep bouncing in the saddle instead of rising smoothly?
Bouncing usually means you're fighting the motion instead of flowing with it. Your hips and lower back are stiff, or you're rising with your upper body instead of your hip angle. Try this: at the walk, practice closing and opening your hip angle without actually rising. Feel how your pelvis can tilt. That subtle motion is what creates the rise at the trot. Also check that you're not holding your breath—breathing keeps your body loose.
Should I post during all types of trot work?
Post for most everyday riding, trail work, and longer trot sessions. Sit the trot for specific dressage movements, collection work, or when your instructor asks for it during flat work. Western riders typically sit the jog, which is a slower, more collected trot than the working trot used in English riding. If your seat isn't strong enough to sit without bouncing, post—bouncing harms the horse's back and your position.
How high should I rise out of the saddle when posting?
Your seat should clear the saddle by two to three inches—just enough that you're not bumping down on the horse's back. You should never fully straighten your legs or stand in the stirrups. The motion is subtle. If someone watches you from the side, your head should stay relatively level; if your head bobs up and down dramatically, you're rising too high.
Most riders grasp the basic mechanics of the rising trot for beginners within two to four lessons. You'll be able to post for short periods—maybe 30 seconds to a minute—without losing your stirrups or bouncing excessively. This doesn't mean it feels good yet. You're still thinking hard about each rise and sit.
Around the six to eight lesson mark, posting shifts from conscious effort to habit. You can post for several minutes without mental exhaustion. You remember to check your diagonal most of the time. Your body starts anticipating the rhythm instead of reacting to it a beat late.
True comfort—where posting feels as natural as walking—typically arrives after 15 to 20 hours of saddle time at the trot. For riders taking weekly lessons, that's roughly four to five months. For riders who lesson twice weekly or own their horse, it might happen in two to three months.
Several factors speed up or slow down this timeline. Riders with dance, gymnastics, or martial arts backgrounds often learn faster because they already understand rhythm and body awareness. Athletic ability helps, but flexibility and coordination matter more than raw strength. Age doesn't determine success—plenty of adults learn to post beautifully, though they might need more repetition than children whose bodies adapt quickly.
Horse quality makes a significant difference. A steady school horse with a regular, moderate trot teaches posting far better than a nervous horse with an erratic rhythm. If you're learning on a horse that speeds up, slows down, or breaks to a walk constantly, your progress will be slower through no fault of your own.
Lesson frequency matters enormously. One lesson per week means you forget some progress between sessions. Twice weekly creates momentum. Riding three or more times weekly with at least some of those rides including trot work accelerates learning dramatically. Even 15 minutes of posting practice per ride adds up.
Don't compare your timeline to others'. Some riders post confidently after three lessons; others need ten. Both are normal. The rider who takes longer often develops a deeper understanding of the mechanics and ends up with better form long-term. Rushing creates bad habits that require fixing later.
Set realistic milestones: First, post for 15 seconds without losing rhythm. Then 30 seconds. Then one full lap of the arena. Then posting through turns. Then posting without stirrups for a few strides. Then automatically posting on the correct diagonal. Each small success builds toward effortless posting.
If you hit a plateau, return to basics. Check your stirrup length, your heel position, your breathing. Sometimes a single adjustment—like dropping your stirrups one hole or looking up instead of down—unlocks sudden improvement. Video yourself riding if possible; seeing your position from outside often reveals issues you can't feel from the saddle.
Mastering how to post while trotting opens up the full potential of riding. Once posting becomes automatic, you can focus on steering, transitions, patterns, and communication with your horse instead of just surviving the gait. The trot transforms from something to endure into something to enjoy. Your horse appreciates the lighter, more balanced rider, and you'll be able to ride longer without fatigue or soreness. Practice the fundamentals consistently, address mistakes as they appear, and give yourself permission to progress at your own pace. Every rider who posts beautifully today started exactly where you are now—bouncing, gripping, and wondering if they'd ever get it. They did, and so will you.
Learn the fundamentals of proper horse riding positions, from the three-point seat to leg alignment. Discover why correct posture matters for safety, communication, and your horse's health, plus exercises to improve your balance and riding form.
Sitting atop a horse for the first time feels nothing like you imagined. This complete guide walks you through everything from your first moments in the saddle to executing basic commands with confidence, covering safety gear, proper posture, mounting techniques, and common beginner mistakes to avoid.
Content on 3templatedesign.site is provided for general informational and educational purposes only. The information on this website may include topics related to horse care, feeding, grooming, horse breeds, training methods, riding techniques, and common horse health conditions.
This content is not intended to be veterinary, medical, training, or professional animal care advice. Horse ownership and riding involve responsibilities and potential risks for both riders and animals.
Users are responsible for evaluating their own experience, equipment, and the condition of their horse before applying any information from this website. Use of this website does not create any professional, veterinary, or advisory relationship with trialstribulations.net.
We are not responsible for any injuries, damages, or losses resulting from the use of information provided on this website. Horse owners and riders are encouraged to consult qualified veterinarians, trainers, or equine professionals when making decisions about horse care or training.